Ah, the Gimkit lobby music. That energetic, 8-bit tune is the sound of “controlled chaos” in classrooms everywhere. You’re about to Gimkit host a game, and your students are already vibrating with anticipation.
You’ve made a great choice. Gimkit isn’t just another quiz game; it’s an entire economy of engagement. But if you’re a new teacher or a first-time host, that “Host Game” button can feel a little daunting. Which mode should you pick? What are all these settings? And how do you stop “Player 62” from dominating the entire game with a $50,000 Quad Blaster?
I’ve hosted hundreds of Gimkit games, from five-minute bell-ringers to epic 30-minute review battles. This is your definitive guide. We’ll walk through every step, from launching the game to making sense of the post-game reports.
What Does It Mean to “Host” a Gimkit Game?
To “host” a Gimkit game means you are the live game-runner and “emcee.” You control the settings, start the game, and display the main leaderboard on your projector. You are the DJ, and the students are on the dance floor. This is different from “Assigning Homework,” which is asynchronous.
When you host a live game, you are in real-time.
- You choose the game mode (like Classic, Team Mode, or Trust No One).
- You set the rules (time limit, starting cash, power-ups).
- You control the lobby, (e.g., removing a student who joined with a silly name).
- You (and the whole class) watch the leaderboard drama unfold on the main screen.
This is the classic, high-energy way to play Gimkit.
The 5-Minute “How to Host a Gimkit Live Game” (Quick Start)
Let’s assume the bell is about to ring and you need to get this game started now. Here is the fastest path from login to launch.
Step 1: Log in and Select Your “Kit”
First, log in to your Gimkit educator account.
- From your Dashboard, find the “Kit” (your question set) you want to use. You can use one you’ve made, one from your favorites, or search the Gimkit gallery for a pre-made one.
- Click the Kit you want to use.
- Click the green “Play Live” button.
[Image placeholder: Screenshot of the Gimkit Kit library, with a red arrow pointing to the “Play Live” button on a Kit.]
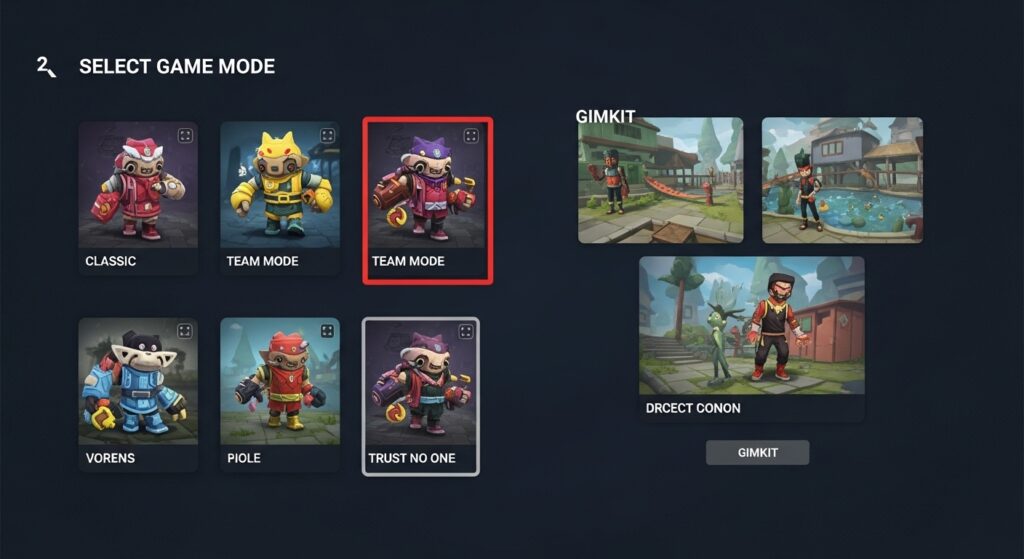
Step 2: Choose Your Game Mode
Gimkit will now show you all its live game modes. This is the most important choice you’ll make.
- For a quick review: Choose “Classic” or “Team Mode.”
- For a high-energy “fun Friday”: Choose “Trust No One.”
- For collaboration: Choose “Boss Battle.”
Click the mode you want. We’ll break down all the modes in detail later in this guide.
Step 3: Adjust Your Game Options (The Settings Screen)
This is your mission control. Don’t just click past it! This screen is where you manage the chaos.
[Image placeholder: Screenshot of the Gimkit game options screen, showing the settings for Time, Starting Cash, etc.]
Here are the settings I check every single time:
- Game Goal: Do you want to play for a set amount of Time, or until one player reaches a Race (money) goal?
- My Pro-Tip: Always choose Time. A 10 or 15-minute game fits perfectly into a class period. “Race” mode can end in two minutes or take an hour. It’s too unpredictable.
- Starting Cash: Give them a little boost. I like to start with $100.
- Music & Sound: The lobby music is iconic. You can turn it on or off. You can also turn off “Clapping,” which is a lifesaver if the “applause” sound after every question gets to be too much.
- Powerups: This is the core of Gimkit. Do you want students to be able to “ice” other players or buy “multipliers”?
- My Pro-Tip: For a serious, data-driven review, I turn power-ups OFF. This makes the leaderboard about knowledge, not who is fastest with the “Re-Viber.” For a fun game, I leave them on.
- Join In Progress: Leave this ON. This allows a student who gets disconnected (or shows up late) to rejoin the game.
Step 4: Click “Continue” and Share the Join Code
Once your settings are dialed in, click “Continue.”
- Your projector will now show the Gimkit Host Screen (the lobby).
- In the center, you will see the 6-digit Gimkit Game Code.
- Tell your students, “Go to gimkit.com/join and enter this code: [Code].”
- You can also display the QR code for students using phones.
Step 5: Start the Game!
You are now in the Lobby. On your screen, you can see the names of students as they join.
- Pro-Tip: This is your last chance for classroom management. If a student joins as “SillyName,” hover over their name and click the “Remove” (X) icon. Tell them to rejoin with their real name.
- Once all your students are in, click the green “Start Game” button.
That’s it! You are now hosting a live Gimkit game. Your screen will change to the leaderboard, and the classroom will fill with the sounds of correct answers and purchased upgrades.
What Am I Looking at? The Gimkit Host Screen Explained
Your screen (the projector) is different from the students’ screens. You have the “God view.” Here’s what you’re seeing.
The Lobby Screen (Before the Game)
This is the waiting room.
- Game Code: Big and in the center.
- Join Link/QR:
gimkit.com/joinand the scannable QR code. - Player List: A list of names on the right. You can click any name to kick them.
- Lock Game Button: A small “lock” icon. Clicking this prevents any new players from joining. I use this right before I start the game to prevent last-second entries.
The Live Game Screen (During the Game)
This is the main event. It shows:
- The Leaderboard: A real-time list of who has the most money.
- The Timer: Counting down in the corner.
- Game Controls (Bottom-Right):
- Music: Mute or change the music.
- Settings: (Limited)
- “End Game”: The big red “Stop” button. Use this if you need to end the game early.
The Post-Game Report (After the Game)
When the timer runs out, the “podium” is displayed. After you click past this, you’re given the Game Report. This is your data.
- Overview: Shows the final leaderboard, total class earnings, and overall class accuracy.
- Student Tab: This is the gold. You can see each student, their final cash, and their individual accuracy (percentage of correct answers).
- Question Tab: This is even better. It shows you each question and what percentage of the class got it right.
I use this Question report immediately. If I see that 80% of the class missed Question #7, I stop everything. We re-teach that concept right now, while the gap is fresh. This turns a “fun game” into a powerful formative assessment.
Which Gimkit Game Mode Should You Choose?
The sheer number of game modes is Gimkit’s best (and most overwhelming) feature. Choosing the right one transforms the lesson. Here’s my “teacher-to-teacher” breakdown of the most popular modes.
Classic & Team Mode (The Originals)
- What it is: The original “quiz-for-cash” game. Students answer questions to earn money, then use that money to buy power-ups and upgrades. Team Mode is the same, but it groups students into teams and pools their money.
- Best for: Quick review, end-of-unit practice, bell-ringers.
- My Pro-Tip: Team Mode is excellent for larger classes. It encourages collaboration and reduces the anxiety of a solo leaderboard. I let teams create their own names.
Trust No One (The “Fun Friday” Game)
- What it is: It’s “Among Us” in Gimkit. Students are “Crewmates” who must complete tasks (answer questions) to earn money. One or more students are “Impostors” who try to sabotage the team.
- Best for: Community building, a reward day, critical thinking.
- My Pro-Tip: This mode is high chaos, low data. You will get very little useful data on student knowledge, but their engagement will be through the roof. Use this as a reward, not a review.
Boss Battle (The Collaborative Game)
- What it is: The entire class works together as one team to defeat a powerful “Boss.” Students answer questions to earn “power” for their attacks.
- Best for: Team building, test review, fostering a positive class culture.
- My Pro-Tip: This is my go-to for a high-stakes test review. It removes the “I’m bad at this” anxiety, as everyone is working together. When the class finally defeats the boss, the cheer is real.
Fishtopia, Dig It Up, & Infinity Mode (The “Zen” Games)
- What it is: These are longer, “economy” based games. Students answer questions to earn money/energy, which they then use to… well, fish, or dig, or build. The questions are just the means to an end.
- Best for: A “do-work” day, a chill reward, or even a sub plan.
- My Pro-Tip: These are great for “soft-start” or “advisory” periods. It’s student-paced, calming, and still reinforces content.
KitCollab (My Secret Weapon for Review)
- What it is: This isn’t a game, it’s a game-builder. You host a KitCollab, and students submit their own questions (with correct and incorrect answers) for the Kit.
- Best for: The day before the review. This is the ultimate student-led activity.
- My Pro-Tip: This is Bloom’s Taxonomy in action. It’s easy to find the correct multiple-choice answer, but it’s hard to write a good question with three plausible distractors. I have students submit 3 questions each, then I “Approve” the good ones, and we play a Classic game with their Kit.
Gimkit Game Mode Comparison Table
| Game Mode | Best For | Energy Level | Data Quality |
| Classic | Quick, competitive review | High | Excellent |
| Team Mode | Collaborative review, large classes | High | Excellent |
| Trust No One | Fun reward day, community building | Chaos! | Very Low |
| Boss Battle | Test review, team building | High (Collaborative) | Good |
| Fishtopia/Infinity | Chill work time, student-paced | Low (“Zen”) | Good |
| KitCollab | Student-led review, high-level thinking | Medium (Creative) | N/A (It’s a builder) |
How to Assign Gimkit as Homework (Asynchronous Mode)
What if you don’t want to host a live game? What if you want students to practice on their own time? That’s the “Assign Homework” feature.
To assign Gimkit as homework, you select a Kit, click “Assign HW” instead of “Play Live,” and set a due date. Gimkit generates a single link that students can complete at their own pace. The host does not need to be present.
Step-by-Step: Assigning Homework
- From your Gimkit Dashboard, select the Kit you want to assign.
- Instead of “Play Live,” click the “Assign HW” button.
- Set a Due Date and Time. After this time, students can no longer complete the assignment.
- Set a “Target Cash” Goal. This is the “end” of the assignment. I recommend setting a goal that takes 15-20 minutes to reach (e.g., $10,000).
- Adjust Settings. You can still control Starting Cash, Power-ups, etc.
- Click “Assign.”
- Gimkit will give you one single link (e.g.,
gimkit.com/homework/12345). - Share this link with your students through Google Classroom, email, or your class website.
Students click the link, play the game solo until they hit the cash target, and their results are saved for you in a report. It’s a fantastic, self-grading homework assignment.
How Do Students Join Your Gimkit Game?
This part is simple, but it’s good to know exactly what your students are seeing.
- Go to the Join Page: Students open their browser (on a laptop or phone) and go to
gimkit.com/join. - Enter the Game Code: They will see a single box. They type in the 6-digit game code from your projector.
- Enter Their Name: They will be prompted for their name.
- Wait in the Lobby: They will now be in the lobby, seeing the same music and player list as everyone else.

Troubleshooting: “Why Isn’t My Gimkit Host Screen Working?”
You’re a teacher. You know that if the tech can fail, it will fail at the worst possible moment. Here are the most common problems and their fixes.
“Students Can’t Join! It Says ‘Invalid Code’!”
This is the most common panic.
- Fix 1: You typed the code wrong on the board. Double-check the code on your screen.
- Fix 2: The students are on the wrong site. They are on
gimkit.com, notgimkit.com/join. Direct them to the correct join page. - Fix 3: You accidentally locked the game. Check for the “Unlock” icon in the lobby.
“Students are Joining with Silly or Inappropriate Names!”
A tale as old as time.
- Fix 1: The Boot. In the lobby, hover over the name and click the “Remove” icon. Do it publicly. “Goodbye,
Player123. Please rejoin with your real name.” - Fix 2: The Proactive Solution. Before you even start, tell them: “You must join with your first name and last initial. I will remove anyone who doesn’t.”
- Fix 3: The Anonymous Option. In the game settings, you can turn on “Random Names.” This assigns students a random, anonymous name (like “Grizzly” or “Otter”). This is excellent for test review, as it removes the “I’m embarrassed to be at the bottom” anxiety.
“The Game is Unbelievably Laggy!”
- Fix 1: Your School’s Wi-Fi. You have 30 students all hitting the same server at the same time. This is a Wi-Fi stress test. Ask students to close all other tabs.
- Fix 2: Your Browser. You (the host) probably have 25 tabs open. Close everything you don’t need. Refresh the host page.
- Fix 3: School Web Filters. School filters can be notoriously finicky. They might be flagging Gimkit’s traffic as “suspicious.” This is an IT problem.
- I’ve seen school filters that block any site with the word “game” but also allow other, more high-risk sites through. Evaluating platforms for safety is a key part of modern teaching. We’ve even done investigative reviews (like our Innocams review) to show how to spot a risky platform. Gimkit is safe, but your filter might not know that.
“The Music/Sound Isn’t Working!”
- Fix 1: Check the in-game mute button on your host screen.
- Fix 2: Check your computer’s system volume.
- Fix 3: Check your projector’s volume. (This is the one that gets me every time. The projector audio is set to 0).
- Fix 4: Your browser might have blocked the site from playing audio. Look for a small “mute” icon on the browser tab itself.
“A Student Got Disconnected! Can They Rejoin?”
- Fix: Yes, if you enabled “Join In Progress” in the game settings before you started. If you did, they can just go to
gimkit.com/joinand enter the code again.
Beyond the Game: Gimkit and Educational Technology
Gimkit is more than just a 15-minute game. It’s a prime example of gamification in educational technology. It works because it taps into the same dopamine loops as video games, but applies them to your curriculum.
It also allows for creative student input. When I use KitCollab, I’m often surprised by the quality of the questions. I also get a lot of image-based questions.
- Pro-Tip: If students submit a photo for a question, make sure it’s usable. I often have to do a quick edit to rotate photos they took sideways with their phone.
- I also encourage students to make their Kit look good. We’ll find a public domain image and add a logo to the picture (like our class or team logo) to make the Kit feel official.
But at the end of the day, it’s a tool. And like any tool, if it breaks, you need support. Gimkit’s support is notoriously hard to find. It’s a small team, and they really want you to use their help docs. It can sometimes feel as frustrating as trying to contact Vinted support, but I’ve found their team (when you can reach them) to be very responsive.
Final Verdict
You’re no longer a rookie. You know how to launch a game, how to choose the right mode, and how to troubleshoot the most common problems.
The real magic of Gimkit isn’t in the code; it’s in the classroom. It’s the sound of a student yelling “No! I just got iced!” It’s the groan when the class leaderboard shuffles. And it’s the high-five when your “Boss Battle” team finally wins with 10 seconds to spare.
You’re not just hosting a game. You’re creating a memorable (and secretly educational) experience. Now go press that “Start Game” button.