We’ve all been there. You take the perfect photo, a great landscape, a flawless group shot, a new product for your Vinted listing—and you open it on your computer. It’s sideways.
That perfect photo of your cat now looks like she’s scaling the wall, Spider-Man style.
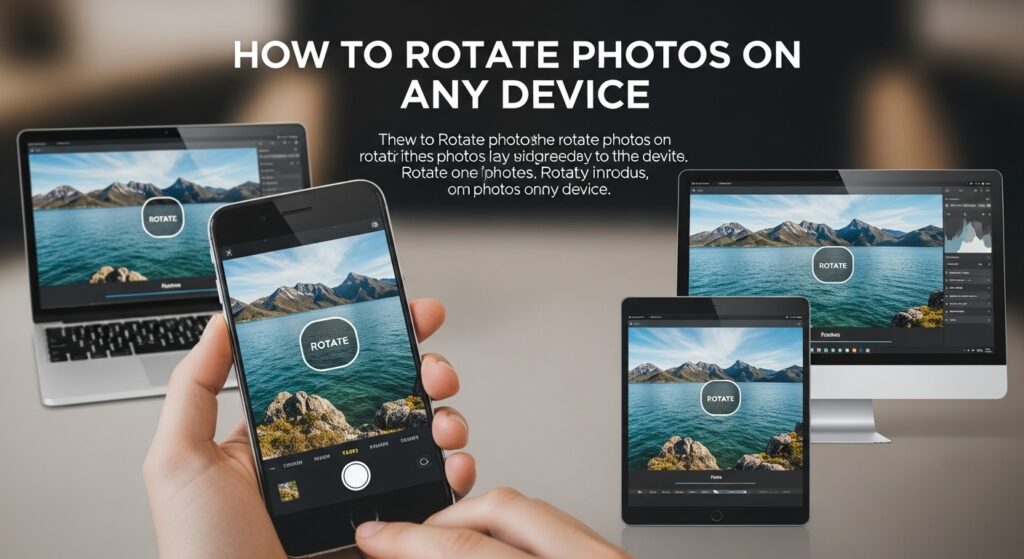
A quick photo rotate is the fix, but the button seems to be in a different place on every device. This is the universal “un-sideways” guide. Whether you’re on a phone, a PC, or a Mac, we’ll show you the fastest, simplest ways to fix your orientation and save your image (and your neck from that 90-degree head tilt).
Why Do Photos End Up Sideways? (A Quick Nerd-Out)
Photos end up sideways because of “EXIF data.” This is hidden information from your phone’s sensor that tells the computer which way was “up.” If the sensor and the software disagree, the photo displays incorrectly, even if it looked fine on your phone.
This information, called Exchangeable Image File Format (EXIF), is a tiny text file baked into your image. It stores data like:
- Your camera model
- The date and time the photo was taken
- GPS location (if you have it enabled)
- And, most importantly, Orientation
Your phone’s gyroscope (the sensor that knows when you turn it) tells the camera which way is “up.” It writes this to the EXIF data.
The problem? Some (especially older) software ignores this EXIF tag and just displays the image file as it was physically saved, which is often sideways. The trick is to perform a permanent rotation, which we’ll cover below.
How to Rotate a Photo on Your Phone (The 90% Use Case)
To rotate a photo on your phone, open it in your default gallery (Photos on iPhone, Google Photos on Android). Tap “Edit,” then find the “Crop” or “Rotate” tool. Tap the rotate icon (a square with a curved arrow) until the orientation is correct, then tap “Done” or “Save.”
This is the task you’ll do most often. Here are the specific steps for your device.
How to Rotate a Photo on an iPhone (The Simple Way)
The iPhone’s built-in Photos app makes this incredibly simple.
- Open the Photos app and tap the image you want to rotate.
- Tap “Edit” in the top-right corner.
- Tap the “Crop” tool at the bottom (it looks like a square with two arrows).
- Look in the top-left corner. You’ll see two icons. The rotate icon is a square with a curved arrow.
- Tap the rotate icon. Each tap will rotate the image 90 degrees counter-clockwise. Keep tapping until it’s correct.
- (Beside it is the “Flip” icon, which looks like two triangles. This creates a mirror image).
- Tap “Done” in the bottom-right corner.
[Image placeholder: Screenshot of the iPhone Photos app ‘Edit’ screen, highlighting the ‘Crop’ tool and the top-left ‘Rotate’ icon.]
That’s it. Your change is saved. The app saves this “non-destructively,” meaning you can go back into “Edit” and “Revert” to the original at any time.
How to Rotate a Photo on Android (Using Google Photos)
Google Photos is the default on most Android phones (like the Pixel). The process is just as easy.
- Open the Google Photos app and select your sideways photo.
- Tap “Edit” at the bottom of the screen.
- The app will show you “Suggestions.” Ignore those and tap “Crop” on the bottom toolbar.
- You will now see a rotate icon (a square with a curved arrow). Tap it.
- Tap it until your photo is upright.
- When you’re finished, tap “Save” in the bottom-right corner.
- Google Photos will ask if you want to “Save” (which overwrites the original) or “Save a copy.” I recommend “Save a copy” just in case.
[Image placeholder: Screenshot of the Google Photos ‘Edit’ screen, highlighting the ‘Crop’ tool and the ‘Rotate’ icon.]
How to Rotate on a Samsung Phone (Gallery App)
Samsung phones often use the “Samsung Gallery” app by default. It’s slightly different from Google Photos.
- Open the Gallery app and find your photo.
- Tap the photo to open it, then tap the “Pencil” (edit) icon at the bottom.
- The first tool you’ll see is the crop/rotate tool (it looks like four corners).
- At the bottom of this new screen, you’ll see a small “Rotate” arrow button. Tap it.
- Keep tapping until the orientation is correct.
- Tap “Save” in the top-right corner.
How to Rotate a Photo on Your Computer (Windows & Mac)
On a computer, you can often rotate directly from the file. On Windows, right-click the image in File Explorer and choose “Rotate left” or “Rotate right.” On a Mac, open the photo in “Preview,” and click the rotate button (a square with an arrow) in the toolbar.
This is often faster than on a phone, especially if you have a lot of photos to fix.
How to Rotate an Image in Windows 10 & 11 (Two Fast Ways)
Windows gives you two great, built-in methods.
Method 1: The File Explorer Right-Click (Fastest & Best)
This is my favorite “pro-tip” because it’s a lossless rotation. It just changes the file’s orientation tag without re-compressing the image, so you lose zero quality.
- Open File Explorer (the yellow folder icon).
- Navigate to the folder containing your photo. Do not open the photo.
- Find the file. Right-click on the image file itself.
- In the context menu, you will see “Rotate right” and “Rotate left.”
- Click the one you need. The thumbnail will update. You’re done. It’s permanently saved.
[Image placeholder: Screenshot of the Windows File Explorer right-click context menu, highlighting ‘Rotate right’ and ‘Rotate left’.]
Method 2: The Windows “Photos” App (Visual Method)
If you already have the photo open, you can do it this way.
- Double-click your photo to open it in the default “Photos” app.
- At the top of the screen, you will see a rotate icon (a square with a curved arrow).
- Alternatively, you can press
Ctrl + Ron your keyboard. - Click the icon (or press the keys) until the photo is upright.
- The Photos app will automatically save the change. You can just close the window.
How to Rotate a Photo on a Mac (Preview is Your Best Friend)
On a Mac, the built-in “Preview” app is a workhorse. It’s the fastest and most efficient way to do this.
Method 1: Using Preview (The Default)
- Double-click your photo. It will open in the Preview app by default.
- In the toolbar at the top, look for the rotate icon (a square with a curved arrow).
- Click it. Your photo will rotate 90 degrees.
- (If you don’t see the icon, go to Tools > Rotate Left or Rotate Right in the top menu bar).
- That’s it. It auto-saves. You can just close the window (
Cmd + Q).
Keyboard Shortcuts for Preview:
Cmd + R(Rotate Right)Cmd + L(Rotate Left)
Method 2: Using the Mac “Photos” App
If you organize your life inside the Mac “Photos” app (similar to the iPhone), the steps are almost identical.
- Open the Photos app.
- Double-click the photo to open it.
- Click “Edit” in the top-right corner.
- In the editing tools on the right, click the “Crop” tab.
- In the top-right corner, click the “Rotate” icon.
- Click “Done.”
How to Rotate Multiple Photos at Once (Batch Rotation)
To rotate multiple photos on Windows, select all the files in File Explorer, right-click, and choose “Rotate right” or “Rotate left.” On a Mac, open all the photos in Preview, select them all in the sidebar, and press Cmd + R.
This is the ultimate timesaver after you’ve imported 50 photos from your camera and they’re all sideways.
Batch Rotate on Windows
- Open the folder in File Explorer.
- Select all the photos you want to rotate. You can:
- Press
Ctrl + Ato select all. - Hold
Ctrland click each photo individually. - Hold
Shiftand click the first and last photo to select a range.
- Press
- Once they are all highlighted, right-click on any one of the selected files.
- From the menu, choose “Rotate right” or “Rotate left.”
- Windows will process all the files at once. This may take a few seconds if you selected hundreds of images.
Batch Rotate on Mac
This is just as easy using the power of Preview.
- Open your folder in Finder.
- Select all the photos you want to rotate (use
Cmd + Aor holdCmdand click). - Right-click and choose “Open With > Preview.”
- A single Preview window will open with a sidebar (thumbnail) on the left showing all your photos.
- In that sidebar, press
Cmd + Ato select all the thumbnails. - Press
Cmd + R(Rotate Right) orCmd + L(Rotate Left). - All the photos will rotate. They will all auto-save. You can now close the window.
How to Rotate a Photo Online (Free Tools)
If you’re on a computer you don’t own (like a public or work computer) or you just want a simple web-based tool, these are fantastic.
How to Use Canva to Rotate an Image
Canva is a free-to-use powerhouse for all simple design tasks.
- Go to
Canva.comand log in (or create a free account). - Create a new design. You can choose “Custom Size” or just “Edit Photo.”
- Upload your sideways photo.
- Click the photo to add it to your design canvas.
- Click the photo to select it. You will see a small rotate handle (a circular arrow icon) at the bottom.
- Click and drag this handle to free-rotate the image.
- For a perfect 90-degree turn, click the photo, click “Position” in the top toolbar, and manually type “90” (or 180, 270) into the “Angle” box.
- When you’re done, click “Share” > “Download” to save your corrected photo.
- This is also a great time to brand your image. While you’re in Canva, you can easily add a logo to your picture before you download it.
How to Use a Quick Tool (like iLoveIMG)
Sometimes you don’t want a full design suite. You just want to do one thing.
- Go to a site like
iloveimg.com/rotate-image. - Click “Select IMAGES” and upload your photo.
- It will show you your image with two rotate buttons: “Rotate LEFT” and “Rotate RIGHT.”
- Click the button you need.
- Click the big “Rotate IMAGES” button.
- It will process and automatically start downloading your corrected file. It’s fast, free, and simple.
Help! Why Won’t My Photo Rotate Correctly? (Troubleshooting)
If your photo keeps rotating back, you’re likely fighting your phone’s “Auto-Rotate” lock. If the rotation doesn’t save, you’re not clicking “Save” or “Export” properly. If it’s right on your phone but sideways on your PC, the EXIF data is likely corrupt.
This is where most of the frustration happens. Let’s fix it.
“My phone’s screen keeps rotating when I try to edit!”
This is the most common complaint on mobile. You’re trying to edit a landscape photo, but when you turn your phone, the app rotates, throwing you off.
- The Fix: You’re fighting “Auto-Rotate,” not the photo.
- On iPhone: Swipe down from the top-right corner to open the Control Center. Tap the Orientation Lock icon (a lock with a circular arrow). This will lock your screen vertically.
- On Android: Swipe down from the top to open the Quick Settings panel. Tap the “Auto-rotate” icon to change it to “Portrait” or “Locked.”
- Now your screen won’t move, and you can edit your photo in peace.
“I rotated my photo, but it didn’t save!”
You opened a photo, clicked rotate, and closed the app. Now it’s still sideways.
- The Fix: You missed the last (and most important) step.
- On every single device—iPhone, Android, Windows Photos—rotating an image is a form of “Editing.” You must confirm your changes.
- Look for the “Done” or “Save” or “Save a copy” button. Click it. Wait for the app to finish saving. Now your change is permanent.
“My photo looks fine on my phone, but it’s sideways on my PC!”
This is the classic, infuriating EXIF data problem we talked about earlier.
- What’s Happening: The image file itself is sideways. Your smart phone (like an iPhone) is reading the EXIF “Orientation” tag and helpfully showing it to you upright. Your dumb Windows PC (or that website you’re uploading it to) is ignoring the EXIF tag and just showing the raw, sideways file.
- The Ultimate Fix (The “360-Degree Re-Save”):
- Open the photo on your phone.
- Tap “Edit.”
- Rotate the photo 360 degrees—all the way around, one tap at a time, until it’s back where it started. (e.g., tap rotate four times).
- Now, tap “Done” or “Save.”
- Why this works: This seemingly pointless action forces the phone to discard the old, corrupt EXIF data and re-save the file. It bakes the correct orientation into the pixels themselves. The newly saved file will be upright everywhere, on any device.
Advanced Questions You’re Too Afraid to Ask
What’s the difference between “Rotate” and “Flip”?
Rotating and flipping are both “transform” properties, but they do very different things.
- Rotate: This turns the image around a central point, like a clock. A 90-degree rotation turns it on its side. A 180-degree rotation turns it upside down.
- Flip: This creates a mirror image. “Flip Horizontal” (the most common) is like holding the photo up to a mirror. “Flip Vertical” turns it upside down, but in a mirror-image way. You’ll use this if text in your photo (from a selfie) looks backward.
For more on the technical side, you can read about transform-rotate properties, but for 99% of users, just know that “rotate” turns the picture and “flip” mirrors it.
Does rotating a photo reduce the quality?
This is a great question. The answer is: it depends on how you rotate it.
- Lossless Rotation: This does not reduce quality. This is what happens when you use the Windows File Explorer right-click method. It doesn’t re-compress the image; it just changes the EXIF tag, telling all software how to display it.
- Lossy Rotation (Re-compression): This can slightly reduce quality. This happens when you open a JPG in an editor (like Canva or Photos), rotate it, and then re-save it as a JPG. Every time a JPG is re-saved, it gets compressed, and you lose a tiny bit of data. For one or two rotates, you will never notice the difference. Don’t worry about it.
Can I rotate a video?
Yes! And the good news is you don’t need a special tool. All the apps we just discussed work for video, too:
- iPhone Photos app: Tap “Edit,” “Crop,” and the “Rotate” icon.
- Google Photos: Tap “Edit,” “Crop,” and the “Rotate” icon.
- Canva: Upload your video, click it, and drag the rotate handle.
Bonus: Other Quick Edits You Can Make
Now that you’ve mastered rotation, you’re officially an image editor.
- After rotating your product photo for your Vinted listing, you might find you still have issues. If the platform is the problem, you may need to learn how to contact Vinted support.
- If you’re rotating an image to use in a presentation, you might want to check out our guides on how to host a Gimkit game to make your presentation more interactive.
- And if you’re rotating security footage, you may be interested in our Innocams review for better camera options.
Final Verdict
Rotating a photo is one of those tiny, annoying tasks that feels more complicated than it is. The truth is, the tool to do it is already built into every device you own.
The 3-step solution is almost always:
- Open the photo.
- Tap “Edit.”
- Find the “Crop/Rotate” tool and tap the button.
Now you have the tools and troubleshooting tips to fix any sideways photo the world throws at you.